How To Register
It’s not too late to register for fall classes at CCRI! Classes begin on September 2.
Registration just got so much easier.
With College Scheduler, you can easily create your perfect semester schedule in just a few simple steps! Select the classes you want, enter the break times you need, then pick from all possible conflict-free schedule options!
Once you have met with your advisor to discuss your major and transfer plan, if applicable. Your advisor will create an Education Plan based on your discussion. This academic plan may be a one or multiple-term semester Education Plan. If registration is open, and you are ready to register proceed to step one.
Step 1: Accessing your Education Plan
- Login to your MyCCRI Account
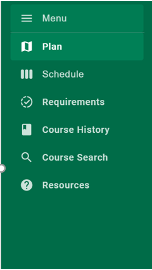
- Click on the "Three Lines" in the top left corner of the screen
- Click on "For Students"
- Locate the Registration Tools card, click the green “Register” button
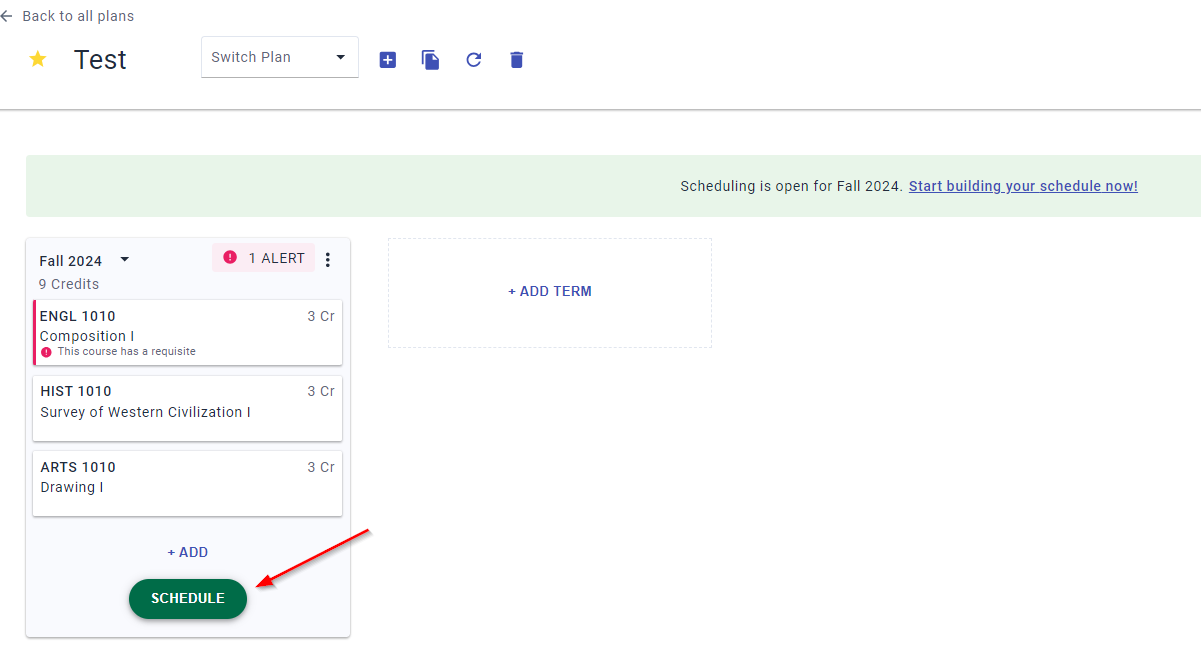
- The recommended classes will appear. See the screenshot below.
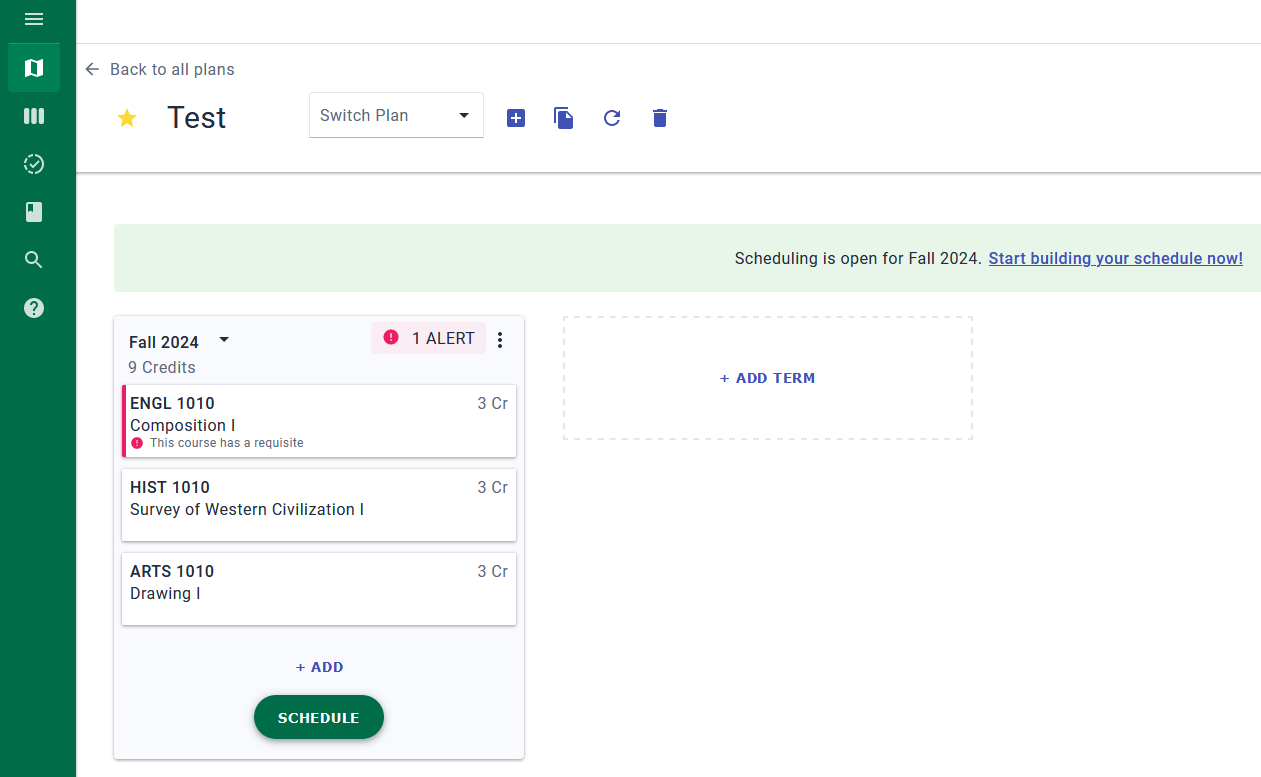
-
- Important Note: If one of the classes recommended for given semester contains more than one option e.g. ENGL 1200, ENGL 1210, ENGL 1220, please select the course you wish to take from the list before clicking the schedule.
- Click the “SCHEDULE” button
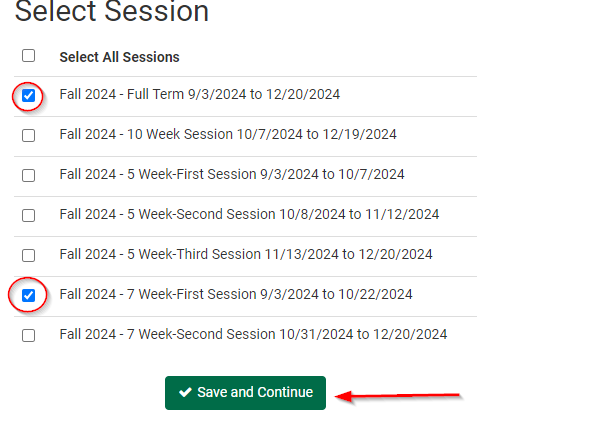
- Next, select the part of term(s) you prefer then click “Save and Continue” (Note: not all courses are offered during all parts of term)
- If your class(es) do not appear:
- Click on the “Three lines” in the top left corner of the screen
- Click on “Schedule”
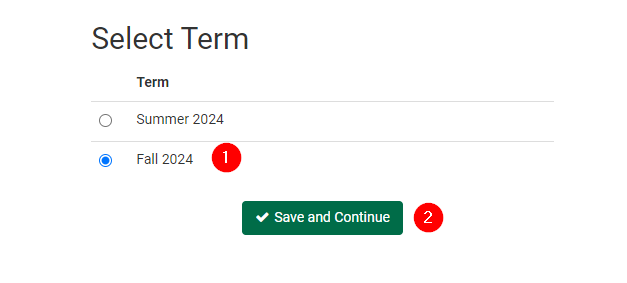
- You may be prompted to “Select Term” and select the term. Then click “Save and Continue”
- Next, select the part of term(s) you prefer then click “Save and Continue” (Note: not all courses are offered during all parts of term).
-
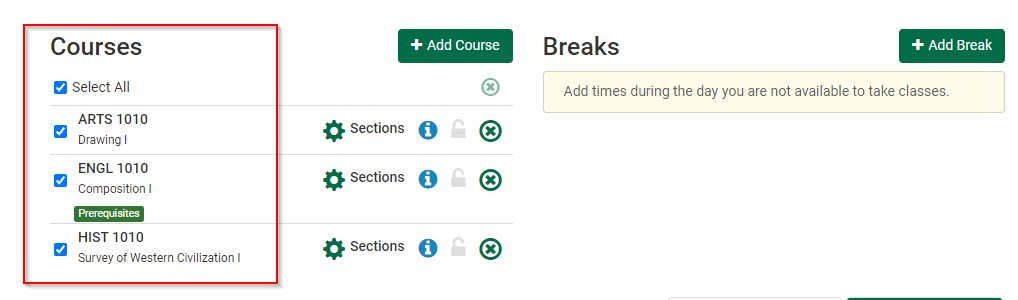
- Your courses should now appear. Please confirm these are the classes you discussed with your advisor before proceeding.
Step 2: Selecting the days and times for your class(es)
- Click the “Generate schedules” and review the auto-generated schedule options.
- If you find a class whose meeting times you want, click the Lock icon to lock it in. This filters your search to show only schedules that include the locked-in class!
- Hover over the “spyglass” to see a quick preview of the schedule
- When you have selected the schedule that works best for you, click “Send to Shopping Cart”
- Review your schedule again
- Click “Register”
- Then click “Continue” to complete your registration.
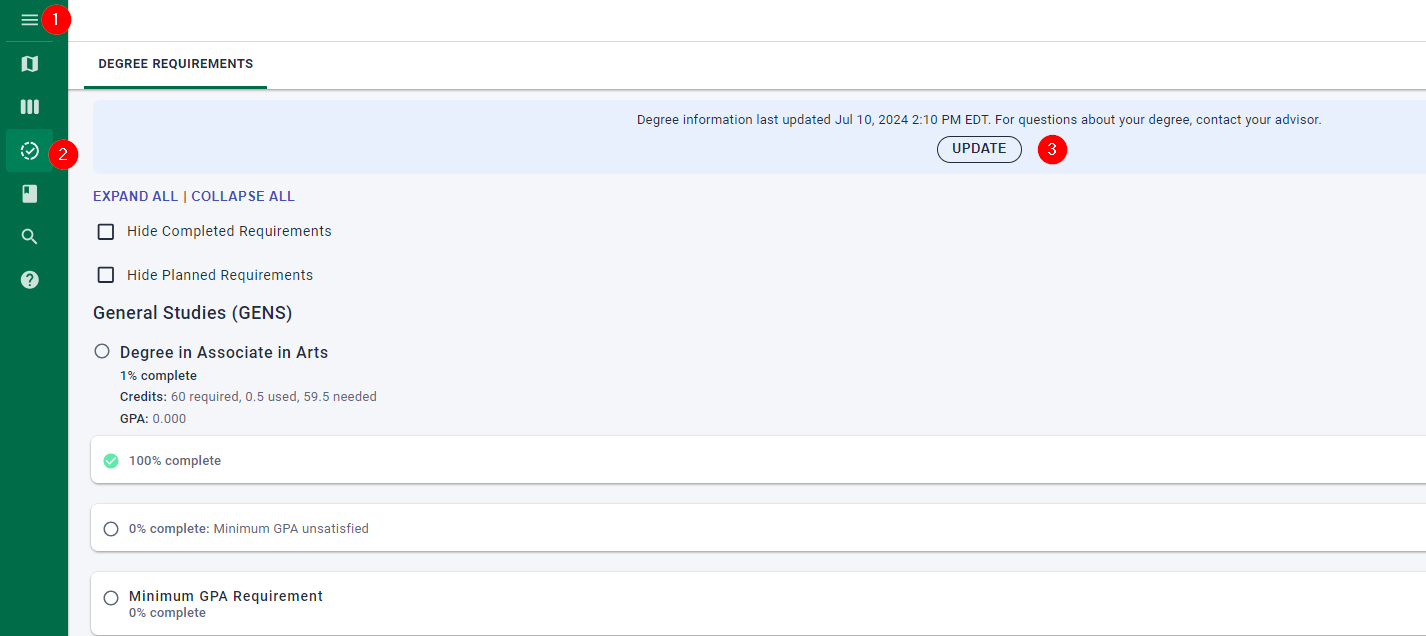
Step 1: Review your degree requirements in Degree Works.
NOTE: It is strongly recommended that you meet with your assigned advisor or an advisor regarding an education plan and/or transfer plan to not waste time and money.
There are two ways you can access your degree requirements:
- Login to your MyCCRI Account
- Click on the "Three Lines" in the top left corner of the screen
- Click on "For Students"
- Locate the My Degree Progress card, click the “View audit” link
- From within the planning tool:
- Click on the “Three lines” in the top left corner of the screen
- Click “Requirements” then “Update”
Example of what will display after completing all three steps. Make note of your required courses.
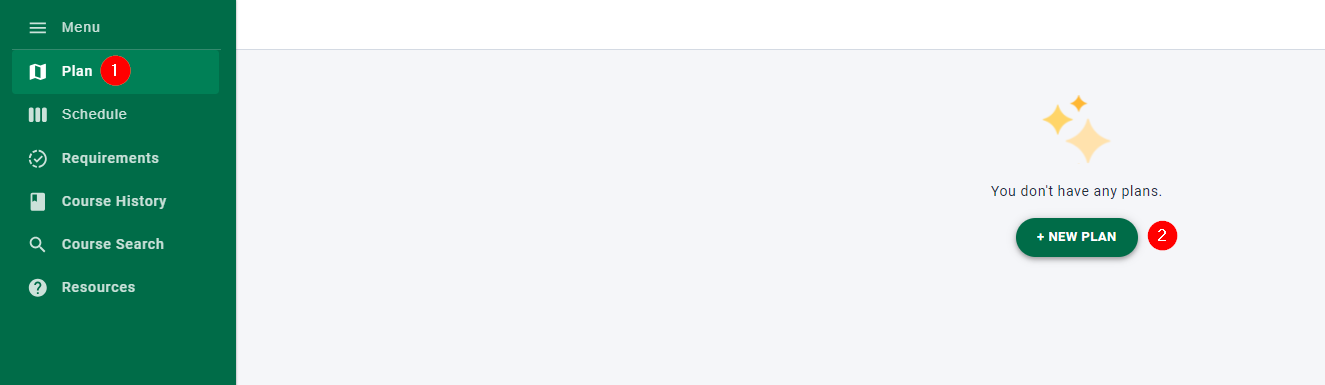
Step 2: From within the planning tool:
- Click on the “Three lines” in the top left corner of the screen
- Click “Plan” then “NEW PLAN”
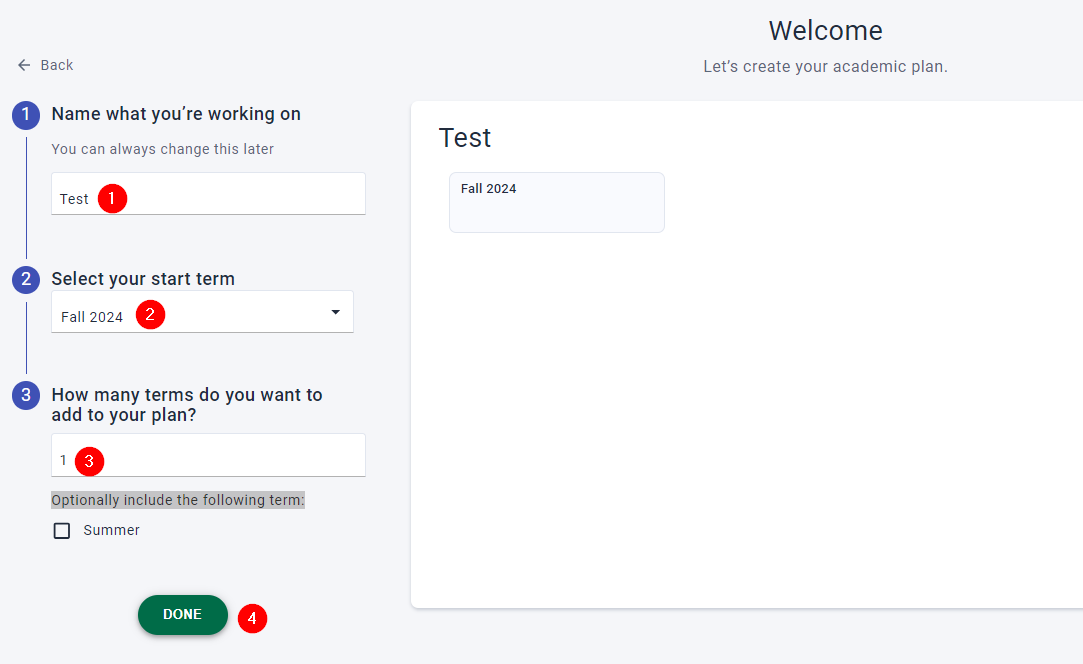
Step 3: Building out the plan:
- Give the academic plan a “title”
- Select the “start term” from the drop list
- Enter the number of terms you wish to create academic plans for (i.e. 1)
- Optionally, you can include summer or winter (when appropriate) in the plan
- Click “Done”
Step 4: Adding classes to your Education Plan
- Click the “Add” button
- Please note: The “schedule” button will appear if you are creating an education plan for a term that is open for registration.
- Click in the box where it says “Item”
- Starting typing in the course name (i.e. ENGL 1010)
- Click on the course name that matches the course you are looking for from the list
-
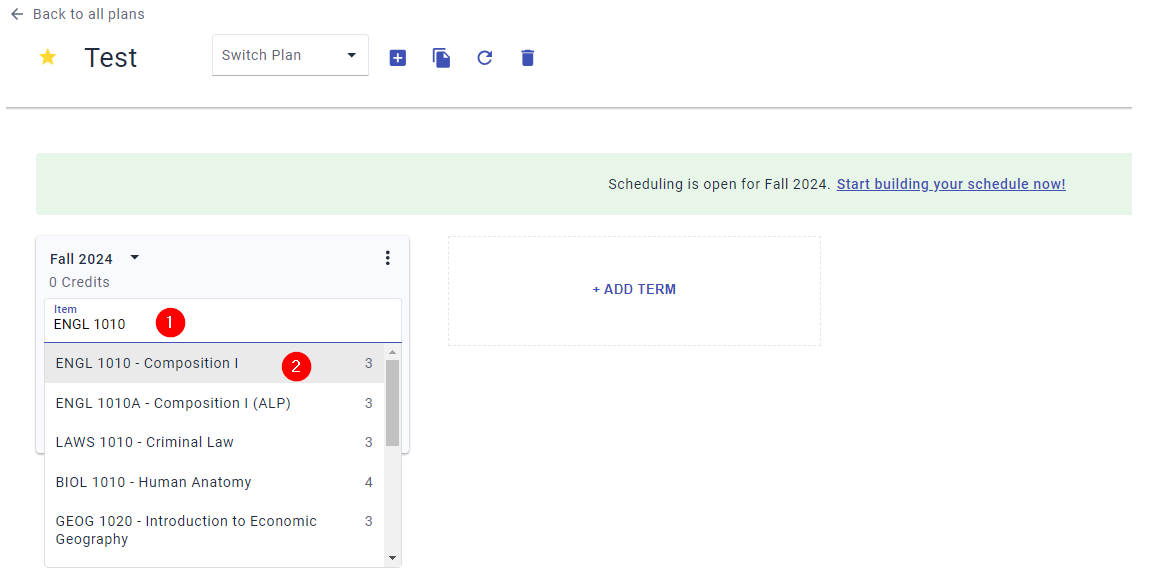
- Repeat the steps in this section if you need to add additional classes.
- Once you finished entering your classes, click the “schedule” button (if present).
- Next, select the part of term(s) you prefer then click “Save and Continue” (Note: not all courses are offered during all parts of term)
Step 5: Selecting the days and times your class(es) meets
- Click the “Generate schedules” and review the auto-generated schedule options.
- If you find a class whose meeting times you want, click the Lock icon to lock it in. This filters your search to show only schedules that include the locked-in class!
- Hover over the “spyglass” to see a quick preview of the schedule
- When you have selected the schedule that works best for you, click “Send to Shopping Cart”
- Review your schedule again
- Click “Register”
- Then click “Continue” to complete your registration.
- Changing your Plan is easy. Click on the “Three lines” on the top left corner of the screen and choose “Plan”
- Select your Plan


- Click on the course you would like to remove, then click “DELETE ITEM”
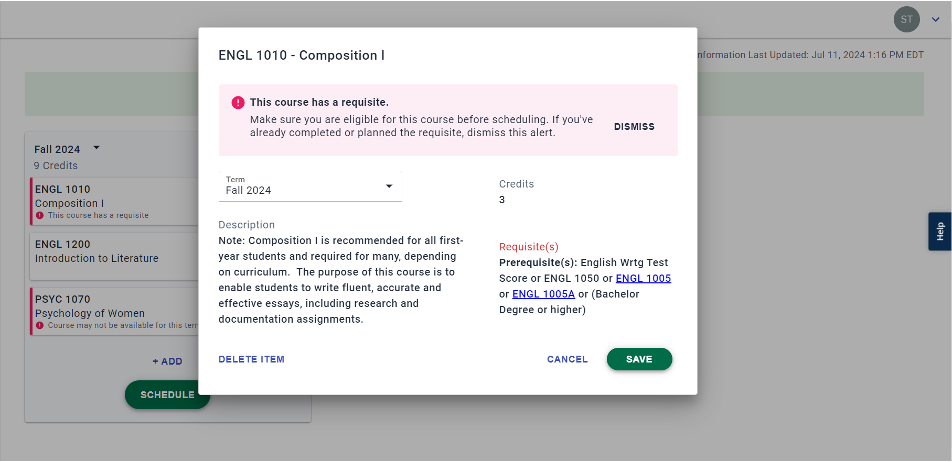
- Note: Clicking on the course also provides a course description, course credits, and course prerequisites (if any).
- To quickly delete the entire Plan and start over, use the icons at the top of the screen

Step 1: Log in to your MyCCRI Account
- Click on the "Three Lines" in the top left corner of the screen
- Click on "For Students"
- Locate the Registration Tools card, click the green “Register” button
- Click on the “Three lines” in the top left corner of the screen
- Click on “Schedule”
- You may be prompted to “Select Term” and select the term. Then click “Save and Continue”
- Next, select the part of term(s) you prefer then click “Save and Continue” (Note: not all courses are offered during all parts of term)
Step 2: Adding Courses
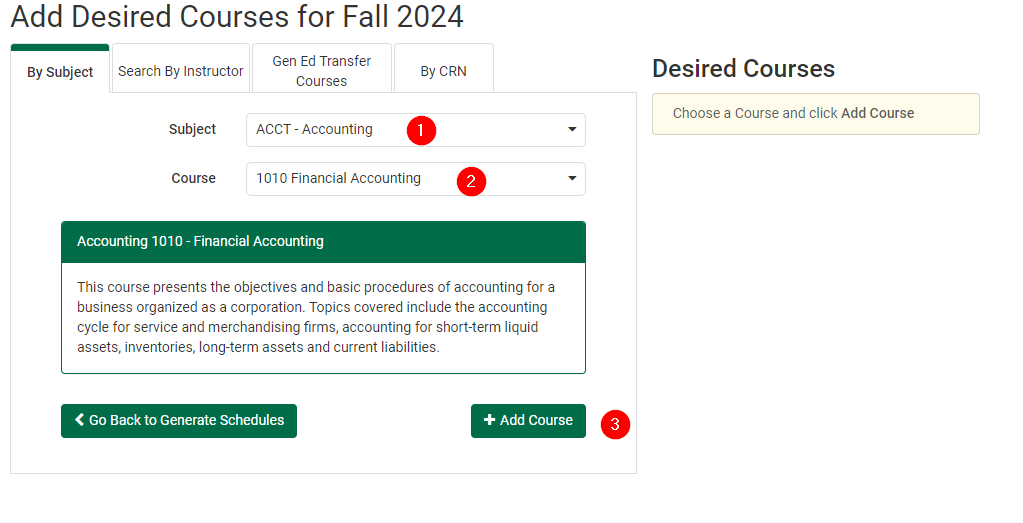
- Click the “Add course”

- Select the course “Subject” from the drop-down list
- Select the “Course” from the drop-down list, then click “Add Course”
- Repeat these steps as many times as needed.
Step 3: Selecting the days and times for your class(es) meets
- Click the “Generate schedules” and review the auto-generated schedule options.
- If you find a class whose meeting times you want, click the Lock icon to lock it in. This filters your search to show only schedules that include the locked-in class!
- Hover over the “spyglass” to see a quick preview of the schedule
- When you have selected the schedule that works best for you, click “Send to Shopping Cart”
- Review your schedule again
- Click “Register”
- Then click “Continue” to complete your registration.
Students are advised to meet with an advisor or Academic Coach before making any changes to their schedule. If a student decides not to meet with an advisor, it’s important to review the academic calendar to understand the deadlines for adding, dropping, and withdrawing from classes for the current term. To learn more about the impact of withdrawing, click here. Additionally, if applicable, contacting the Office of Financial Aid before making changes to your schedule can be beneficial.
Step-by-step instructions:
- Click on the "Three Lines" in the top left corner of the screen
- Click on "For Students"
- Locate the Registration Tools card, click the green “Register” button
- Click on the “Three lines” in the top left corner of the screen
- Click on “Schedule”
- You may be prompted to “Select Term” and select the term. Then click “Save and Continue”
- Locate and click the tab heading “View\Edit Schedule”
- Click the green “Edit or Drop Classes” button
- To the right of each class there will be a dropdown box indicating the registration status of the course.
- Click the “down-arrow” to the right of the registration status box and select the action you wish to take from the list.
- Click “Save” and follow any additional prompts to complete this action.
We're Here to Help!
Our team is here to assist you every day either in person at one of our campus locations or virtually.
On Campus Walk-in-Sessions
No Appointment Necessary. Assistance with Course Selection & Registration
Schedule
- Tuesday, August 19: 9AM - 3PM
- Wednesday, August 20: 9AM - 3PM
- Thursday, August 21: 9AM - 3PM
- Monday, August 25: 9AM - 3PM
- Tuesday, August 26: 9AM - 3PM
- Wednesday, August 27: 9AM - 3PM
- Thursday, August 28: 1:30PM - 3PM
- Friday, August 29: 9AM - 3PM
Virtual Drop-in-Sessions
No Appointment Necessary. Meet one-on-one with an Academic Advisor/Student Success Coach to discuss your education plans and goals.
Schedule
Need Help Registering?
Our hours are Monday through Friday 8:00 a.m. - 4:00 p.m. Please contact us during business hours at [email protected], or call us at 401-825-2003 for assistance with all of your enrollment needs.

Registration Information
7-Week Sessions: 7-week classes allow students to focus more intensely on fewer classes at a time. To learn more about this flexible option and see if it is the right fit for you, visit https://www.ccri.edu/advising/seven-week.html.
New students: Please submit an application at https://www.ccri.edu/onestop/admissions/apply/.
International students: Please see https://www.ccri.edu/onestop/admissions/international/ for detailed information.
View your degree evaluation: The Degree Works degree evaluation link is available in MyCCRI. Run a Degree Works
degree evaluation so you will know which course(s) to register for that will apply
to your degree or certificate program.
Academic advising: All students enrolled in a degree or certificate program will be assigned a Student
Success Coach. Your assigned coach is listed in MyCCRI. To connect with your coach,
please access your Starfish Account.
Verification of Enrollment: CCRI is obligated to verify that students are academically engaged in their courses as part of the Federal Financial Aid requirements. Therefore, it
is essential for students to attend their classes, complete assignments by due dates,
and stay in contact with their instructor(s). Review tips to avoid being dropped from class as a no-show.
Directory non-disclosure: Students who complete paperwork to prevent disclosure of directory information must
contact One Stop Student Services at [email protected] to register.
Welcome to CCRI
Apply for Free Today!We're excited about your interest in attending the Community College of Rhode Island! Whether you're looking to discover your career path, start or complete your college degree, or take classes to enrich your life, we look forward to having you join our community!